How to send a document for signature
Sending a contract for e-signature takes three steps in Docubird: add the people, place their fields, then set options and send. This guide walks through each one.
Before you start
Have the document ready as a PDF or Word file, or write it in the Docubird editor. Know who needs to approve, who needs to sign and who just needs a copy.
Step 1: Add the people
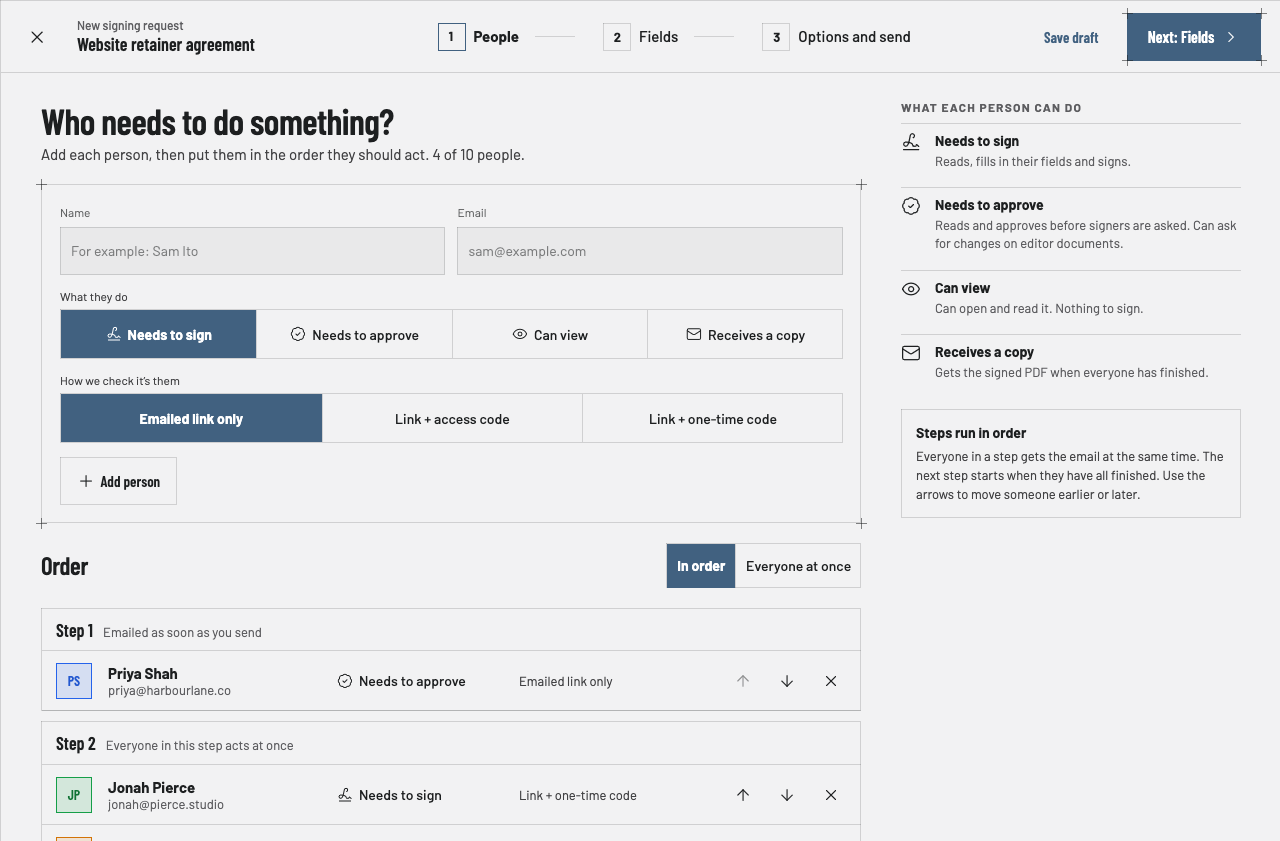
Add each person with their name and email, and choose what they do: Needs to approve, Needs to sign, Receives a copy or Can view.
Put them in steps. Steps run in order, and everyone in a step is asked at the same time. Each person gets their own colour.
Step 2: Place the fields
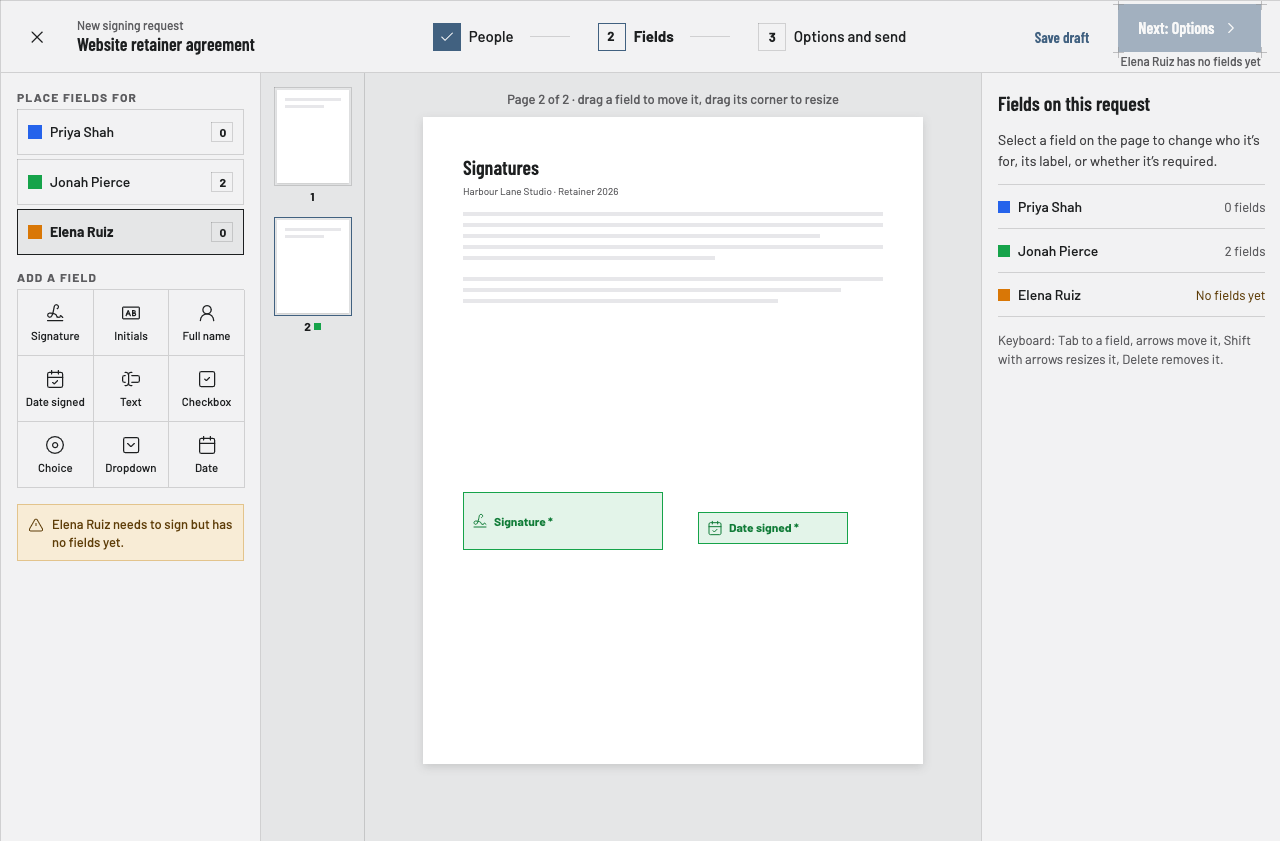
Pick a person on the left, then add fields for them: Signature, Initials, Full name, Date signed, Text, Checkbox, Choice, Dropdown or Date. Drag a field to move it and drag its corner to resize.
Docubird won’t let you continue while a signer has no fields, so nobody gets a document with nothing to sign.
Step 3: Options and send
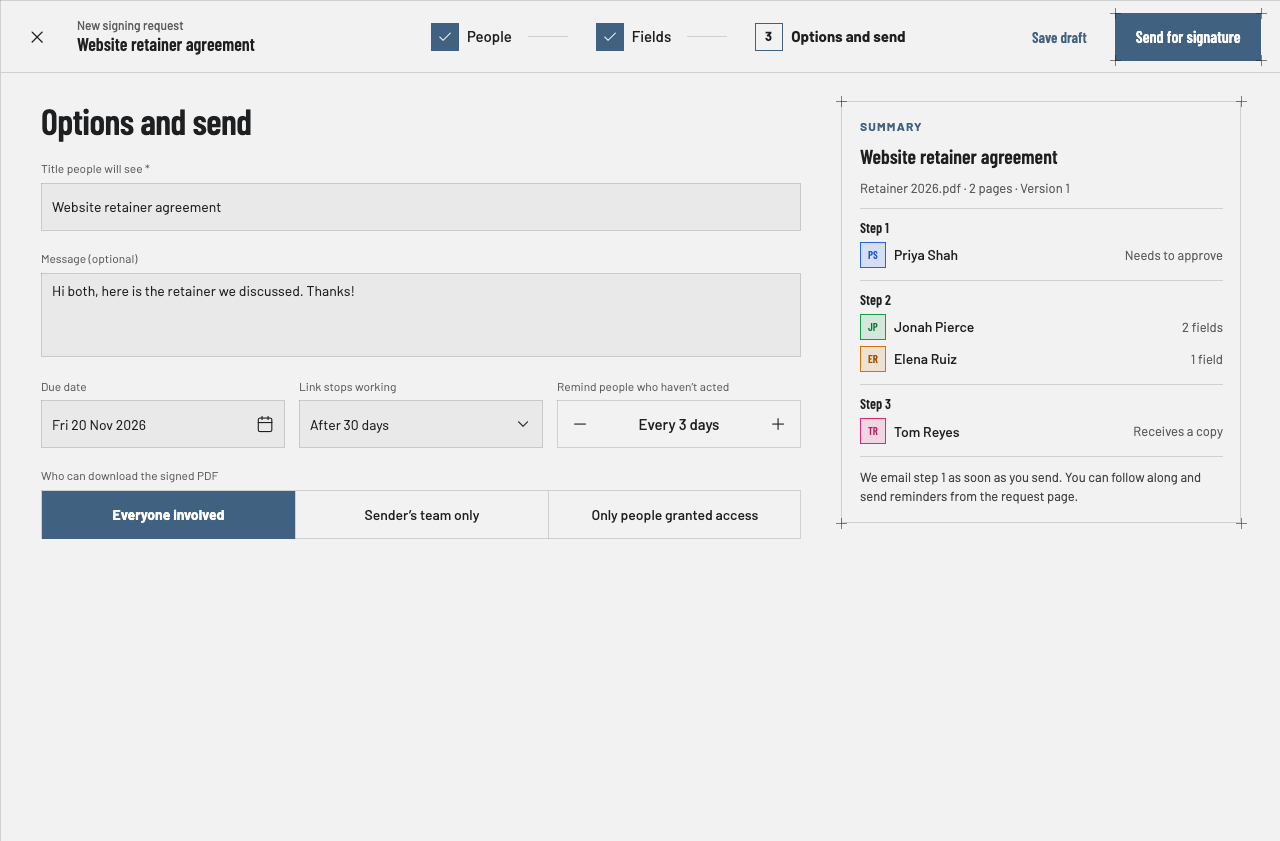
Give the request a title people will see and an optional message. Set a due date, when the link stops working, and how often to remind people who haven’t acted.
Choose who can download the signed PDF, then select Send for signature.
After you send
The request page shows each step, each person’s status and when they viewed it. Select Remind to nudge someone. When everyone has finished, you get a sealed PDF and a certificate page.
Questions
How many people can I add?+
Up to ten people per request.
Can I save a draft?+
Yes. Select Save draft at any step and come back later.